NOTE: Revised April 2018
Spring MVC provides several complimentary approaches to exception handling but, when teaching Spring MVC, I often find that my students are confused or not comfortable with them.
Today I’m going to show you the various options available. Our goal is to not handle exceptions explicitly in Controller methods where possible. They are a cross-cutting concern better handled separately in dedicated code.
There are three options: per exception, per controller or globally.
A demonstration application that shows the points discussed here can be found at
http://github.com/paulc4/mvc-exceptions. See Sample Application below for details.
NOTE: The demo applications has been revamped and updated (April 2018) to use Spring Boot 2.0.1 and is (hopefully) easier to use and understand. I also fixed some broken links (thanks for the feedback, sorry it took a while).
Spring Boot
Spring Boot allows a Spring project to be setup with minimal configuration and it is likely that you are using it if your application is less than a few years old.
Spring MVC offers no default (fall-back) error page out-of-the-box. The most common way to set a default error page has always been the SimpleMappingExceptionResolver (since Spring V1 in fact). We will discuss this later.
However Spring Boot does provide for a fallback error-handling page.
At start-up, Spring Boot tries to find a mapping for /error. By convention, a URL ending in /error maps to a logical view of the same name: error. In the demo application this view maps in turn to the error.html Thymeleaf template. (If using JSP, it would map to error.jsp according to the setup of your InternalResourceViewResolver). The actual mapping will depend on what ViewResolver (if any) that you or Spring Boot has setup.
If no view-resolver mapping for /error can be found, Spring Boot defines its own fall-back error page — the so-called “Whitelabel Error Page” (a minimal page with just the HTTP status information and any error details, such as the message from an uncaught exception). In the sample applicaiton, if you rename the error.html template to, say, error2.html then restart, you will see it being used.
If you are making a RESTful request (the HTTP request has specified a desired response type other than HTML) Spring Boot returns a JSON representation of the same error information that it puts in the “Whitelabel” error page.
$> curl -H "Accept: application/json" http://localhost:8080/no-such-page

{"timestamp":"2018-04-11T05:56:03.845+0000","status":404,"error":"Not Found","message":"No message available","path":"/no-such-page"}
Spring Boot also sets up a default error-page for the container, equivalent to the<error-page> directive in web.xml (although implemented very differently). Exceptions thrown outside the Spring MVC framework, such as from a servlet Filter, are still reported by the Spring Boot fallback error page. The sample application also shows an example of this.
A more in-depth discussion of Spring Boot error-handling can be found at the end of this article.
The rest of this article applies regardless of whether you are using Spring with or without Spring Boot.
Impatient REST developers may choose to skip directly to the section on custom REST error responses. However they should then read the full article as most of it applies equally to all web applications, REST or otherwise.
Using HTTP Status Codes
Normally any unhandled exception thrown when processing a web-request causes the server to return an HTTP 500 response. However, any exception that you write yourself can be annotated with the @ResponseStatus annotation (which supports all the HTTP status codes defined by the HTTP specification). When an annotated exception is thrown from a controller method, and not handled elsewhere, it will automatically cause the appropriate HTTP response to be returned with the specified status-code.
For example, here is an exception for a missing order.
 @ResponseStatus(value=HttpStatus.NOT_FOUND, reason="No such Order")  // 404
 public class OrderNotFoundException extends RuntimeException {
     // ...
 }
And here is a controller method using it:
 @RequestMapping(value="/orders/{id}", method=GET)
 public String showOrder(@PathVariable("id") long id, Model model) {
     Order order = orderRepository.findOrderById(id);

     if (order == null) throw new OrderNotFoundException(id);

     model.addAttribute(order);
     return "orderDetail";
 }
A familiar HTTP 404 response will be returned if the URL handled by this method includes an unknown order id.
Controller Based Exception Handling
Using @ExceptionHandler
You can add extra (@ExceptionHandler) methods to any controller to specifically handle exceptions thrown by request handling (@RequestMapping) methods in the same controller. Such methods can:
- Handle exceptions without the
@ResponseStatusannotation (typically predefined exceptions that you didn’t write) - Redirect the user to a dedicated error view
- Build a totally custom error response
The following controller demonstrates these three options:
@Controller
public class ExceptionHandlingController {

  // @RequestHandler methods
  ...

  // Exception handling methods

  // Convert a predefined exception to an HTTP Status code
  @ResponseStatus(value=HttpStatus.CONFLICT,
                  reason="Data integrity violation")  // 409
  @ExceptionHandler(DataIntegrityViolationException.class)
  public void conflict() {
    // Nothing to do
  }

  // Specify name of a specific view that will be used to display the error:
  @ExceptionHandler({SQLException.class,DataAccessException.class})
  public String databaseError() {
    // Nothing to do.  Returns the logical view name of an error page, passed
    // to the view-resolver(s) in usual way.
    // Note that the exception is NOT available to this view (it is not added
    // to the model) but see "Extending ExceptionHandlerExceptionResolver"
    // below.
    return "databaseError";
  }

  // Total control - setup a model and return the view name yourself. Or
  // consider subclassing ExceptionHandlerExceptionResolver (see below).
  @ExceptionHandler(Exception.class)
  public ModelAndView handleError(HttpServletRequest req, Exception ex) {
    logger.error("Request: " + req.getRequestURL() + " raised " + ex);

    ModelAndView mav = new ModelAndView();
    mav.addObject("exception", ex);
    mav.addObject("url", req.getRequestURL());
    mav.setViewName("error");
    return mav;
  }
}
In any of these methods you might choose to do additional processing — the most common example is to log the exception.
Handler methods have flexible signatures so you can pass in obvious servlet-related objects such as HttpServletRequest, HttpServletResponse, HttpSession and/or Principle.
Important Note: The Model may not be a parameter of any @ExceptionHandler method. Instead, setup a model inside the method using a ModelAndView as shown by handleError() above.
Exceptions and Views
Be careful when adding exceptions to the model. Your users do not want to see web-pages containing Java exception details and stack-traces. You may have security policies that expressly forbid putting any exception information in the error page. Another reason to make sure you override the Spring Boot white-label error page.
Make sure exceptions are logged usefully so they can be analyzed after the event by your support and development teams.
Please remember the following may be convenient but it is not best practice in production.
It can be useful to hide exception details in the page source as a comment, to assist testing. If using JSP, you could do something like this to output the exception and the corresponding stack-trace (using a hidden <div> is another option).
  <h1>Error Page</h1>
  <p>Application has encountered an error. Please contact support on ...</p>

  <!--
    Failed URL: ${url}
    Exception:  ${exception.message}
        <c:forEach items="${exception.stackTrace}" var="ste">    ${ste}
    </c:forEach>
  -->
For the Thymeleaf equivalent see support.html in the demo application. The result looks like this.

Global Exception Handling
Using @ControllerAdvice Classes
A controller advice allows you to use exactly the same exception handling techniques but apply them across the whole application, not just to an individual controller. You can think of them as an annotation driven interceptor.
Any class annotated with @ControllerAdvice becomes a controller-advice and three types of method are supported:
- Exception handling methods annotated with
@ExceptionHandler. - Model enhancement methods (for adding additional data to the model) annotated with
@ModelAttribute. Note that these attributes are not available to the exception handling views. - Binder initialization methods (used for configuring form-handling) annotated with
@InitBinder.
We are only going to look at exception handling — search the online manual for more on @ControllerAdvice methods.
Any of the exception handlers you saw above can be defined on a controller-advice class — but now they apply to exceptions thrown from any controller. Here is a simple example:
@ControllerAdvice
class GlobalControllerExceptionHandler {
    @ResponseStatus(HttpStatus.CONFLICT)  // 409
    @ExceptionHandler(DataIntegrityViolationException.class)
    public void handleConflict() {
        // Nothing to do
    }
}
If you want to have a default handler for any exception, there is a slight wrinkle. You need to ensure annotated exceptions are handled by the framework. The code looks like this:
@ControllerAdvice
class GlobalDefaultExceptionHandler {
  public static final String DEFAULT_ERROR_VIEW = "error";

  @ExceptionHandler(value = Exception.class)
  public ModelAndView
  defaultErrorHandler(HttpServletRequest req, Exception e) throws Exception {
    // If the exception is annotated with @ResponseStatus rethrow it and let
    // the framework handle it - like the OrderNotFoundException example
    // at the start of this post.
    // AnnotationUtils is a Spring Framework utility class.
    if (AnnotationUtils.findAnnotation
                (e.getClass(), ResponseStatus.class) != null)
      throw e;

    // Otherwise setup and send the user to a default error-view.
    ModelAndView mav = new ModelAndView();
    mav.addObject("exception", e);
    mav.addObject("url", req.getRequestURL());
    mav.setViewName(DEFAULT_ERROR_VIEW);
    return mav;
  }
}
Going Deeper
HandlerExceptionResolver
Any Spring bean declared in the DispatcherServlet’s application context that implements HandlerExceptionResolver will be used to intercept and process any exception raised in the MVC system and not handled by a Controller. The interface looks like this:
public interface HandlerExceptionResolver {
    ModelAndView resolveException(HttpServletRequest request,
            HttpServletResponse response, Object handler, Exception ex);
}
The handler refers to the controller that generated the exception (remember that @Controller instances are only one type of handler supported by Spring MVC. For example: HttpInvokerExporter and the WebFlow Executor are also types of handler).
Behind the scenes, MVC creates three such resolvers by default. It is these resolvers that implement the behaviours discussed above:
ExceptionHandlerExceptionResolvermatches uncaught exceptions against suitable@ExceptionHandlermethods on both the handler (controller) and on any controller-advices.ResponseStatusExceptionResolverlooks for uncaught exceptions annotated by@ResponseStatus(as described in Section 1)DefaultHandlerExceptionResolverconverts standard Spring exceptions and converts them to HTTP Status Codes (I have not mentioned this above as it is internal to Spring MVC).
These are chained and processed in the order listed — internally Spring creates a dedicated bean (the HandlerExceptionResolverComposite) to do this.
Notice that the method signature of resolveException does not include the Model. This is why @ExceptionHandler methods cannot be injected with the model.
You can, if you wish, implement your own HandlerExceptionResolver to setup your own custom exception handling system. Handlers typically implement Spring’s Ordered interface so you can define the order that the handlers run in.
SimpleMappingExceptionResolver
Spring has long provided a simple but convenient implementation of HandlerExceptionResolver that you may well find being used in your appication already — the SimpleMappingExceptionResolver. It provides options to:
- Map exception class names to view names — just specify the classname, no package needed.
- Specify a default (fallback) error page for any exception not handled anywhere else
- Log a message (this is not enabled by default).
- Set the name of the
exceptionattribute to add to the Model so it can be used inside a View
(such as a JSP). By default this attribute is namedexception. Set tonullto disable. Remember that views returned from@ExceptionHandlermethods do not have access to the exception but views defined toSimpleMappingExceptionResolverdo.
Here is a typical configuration using Java Configuration:
@Configuration
@EnableWebMvc  // Optionally setup Spring MVC defaults (if you aren't using
               // Spring Boot & haven't specified @EnableWebMvc elsewhere)
public class MvcConfiguration extends WebMvcConfigurerAdapter {
  @Bean(name="simpleMappingExceptionResolver")
  public SimpleMappingExceptionResolver
                  createSimpleMappingExceptionResolver() {
    SimpleMappingExceptionResolver r =
                new SimpleMappingExceptionResolver();

    Properties mappings = new Properties();
    mappings.setProperty("DatabaseException", "databaseError");
    mappings.setProperty("InvalidCreditCardException", "creditCardError");

    r.setExceptionMappings(mappings);  // None by default
    r.setDefaultErrorView("error");    // No default
    r.setExceptionAttribute("ex");     // Default is "exception"
    r.setWarnLogCategory("example.MvcLogger");     // No default
    return r;
  }
  ...
}
Or using XML Configuration:
  <bean id="simpleMappingExceptionResolver" class=
     "org.springframework.web.servlet.handler.SimpleMappingExceptionResolver">
    <property name="exceptionMappings">
      <map>
         <entry key="DatabaseException" value="databaseError"/>
         <entry key="InvalidCreditCardException" value="creditCardError"/>
      </map>
    </property>

    <!-- See note below on how this interacts with Spring Boot -->
    <property name="defaultErrorView" value="error"/>
    <property name="exceptionAttribute" value="ex"/>

    <!-- Name of logger to use to log exceptions. Unset by default,
           so logging is disabled unless you set a value. -->
    <property name="warnLogCategory" value="example.MvcLogger"/>
  </bean>
The defaultErrorView property is especially useful as it ensures any uncaught exception generates a suitable application defined error page. (The default for most application servers is to display a Java stack-trace — something your users should never see). Spring Boot provides another way to do the same thing with its “white-label” error page.
Extending SimpleMappingExceptionResolver
It is quite common to extend SimpleMappingExceptionResolver for several reasons:
- You can use the constructor to set properties directly — for example to enable exception logging and set the logger to use
- Override the default log message by overriding
buildLogMessage. The default implementation always returns this fixed text:- Handler execution resulted in exception
- To make additional information available to the error view by overriding
doResolveException
For example:
public class MyMappingExceptionResolver extends SimpleMappingExceptionResolver {
  public MyMappingExceptionResolver() {
    // Enable logging by providing the name of the logger to use
    setWarnLogCategory(MyMappingExceptionResolver.class.getName());
  }

  @Override
  public String buildLogMessage(Exception e, HttpServletRequest req) {
    return "MVC exception: " + e.getLocalizedMessage();
  }

  @Override
  protected ModelAndView doResolveException(HttpServletRequest req,
        HttpServletResponse resp, Object handler, Exception ex) {
    // Call super method to get the ModelAndView
    ModelAndView mav = super.doResolveException(req, resp, handler, ex);

    // Make the full URL available to the view - note ModelAndView uses
    // addObject() but Model uses addAttribute(). They work the same.
    mav.addObject("url", request.getRequestURL());
    return mav;
  }
}
This code is in the demo application as ExampleSimpleMappingExceptionResolver
Extending ExceptionHandlerExceptionResolver
It is also possible to extend ExceptionHandlerExceptionResolver and override itsdoResolveHandlerMethodException method in the same way. It has almost the same signature (it just takes the new HandlerMethod instead of a Handler).
To make sure it gets used, also set the inherited order property (for example in the constructor of your new class) to a value less than MAX_INT so it runs before the default ExceptionHandlerExceptionResolver instance (it is easier to create your own handler instance than try to modify/replace the one created by Spring). See ExampleExceptionHandlerExceptionResolver in the demo app for more.
Errors and REST
RESTful GET requests may also generate exceptions and we have already seen how we can return standard HTTP Error response codes. However, what if you want to return information about the error? This is very easy to do. Firstly define an error class:
public class ErrorInfo {
    public final String url;
    public final String ex;

    public ErrorInfo(String url, Exception ex) {
        this.url = url;
        this.ex = ex.getLocalizedMessage();
    }
}
Now we can return an instance from a handler as the @ResponseBody like this:
@ResponseStatus(HttpStatus.BAD_REQUEST)
@ExceptionHandler(MyBadDataException.class)
@ResponseBody ErrorInfo
handleBadRequest(HttpServletRequest req, Exception ex) {
    return new ErrorInfo(req.getRequestURL(), ex);
}
What to Use When?
As usual, Spring likes to offer you choice, so what should you do? Here are some rules of thumb. However if you have a preference for XML configuration or Annotations, that’s fine too.
- For exceptions you write, consider adding
@ResponseStatusto them. - For all other exceptions implement an
@ExceptionHandlermethod on a@ControllerAdviceclass or use an instance ofSimpleMappingExceptionResolver. You may well haveSimpleMappingExceptionResolverconfigured for your application already, in which case it may be easier to add new exception classes to it than implement a@ControllerAdvice. - For Controller specific exception handling add
@ExceptionHandlermethods to your controller. - Warning: Be careful mixing too many of these options in the same application. If the same exception can be handed in more than one way, you may not get the behavior you wanted.
@ExceptionHandlermethods on the Controller are always selected before those on any@ControllerAdviceinstance. It is undefined what order controller-advices are processed.
Sample Application
A demonstration application can be found at github. It uses Spring Boot and Thymeleaf to build a simple web application.
The application has been revised twice (Oct 2014, April 2018) and is (hopefully) better and easier to understand. The fundamentals stay the same. It uses Spring Boot V2.0.1 and Spring V5.0.5 but the code is applicable to Spring 3.x and 4.x also.
The demo is running on Cloud Foundry at http://mvc-exceptions-v2.cfapps.io/.
About the Demo
The application leads the user through 5 demo pages, highlighting different exception handling techniques:
- A controller with
@ExceptionHandlermethods to handle its own exceptions - A contoller that throws exceptions for a global ControllerAdvice to handle
- Using a
SimpleMappingExceptionResolverto handle exceptions - Same as demo 3 but with the
SimpleMappingExceptionResolverdisabled for comparison - Shows how Spring Boot generates its error page
A description of the most important files in the application and how they relate to each demo can be found in the project’s README.md.
The home web-page is index.html which:
- Links to each demo page
- Links (bottom of the page) to Spring Boot endpoints for those interested in Spring Boot.
Each demo page contains several links, all of which deliberately raise exceptions. You will need to use the back-button on your browser each time to return to the demo page.
Thanks to Spring Boot, you can run this demo as a Java application (it runs an embedded Tomcat container). To run the application, you can use one of the following (the second is thanks to the Spring Boot maven plugin):
mvn exec:javamvn spring-boot:run
Your choice. The home page URL will be http://localhost:8080.
Error Page Contents
Also in the demo application I show how to create a “support-ready” error page with a stack-trace hidden in the HTML source (as a comment). Ideally support should get this information from the logs, but life isn’t always ideal. Regardless, what this page does show is how the underlying error-handling method handleError creates its own ModelAndView to provide extra information in the error page. See:
ExceptionHandlingController.handleError()on githubGlobalControllerExceptionHandler.handleError()on github
Spring Boot and Error Handling
Spring Boot allows a Spring project to be setup with minimal configuration. Spring Boot creates sensible defaults automatically when it detects certain key classes and packages on the classpath. For example if it sees that you are using a Servlet environment, it sets up Spring MVC with the most commonly used view-resolvers, hander mappings and so forth. If it sees JSP and/or Thymeleaf, it sets up these view-technologies.
Fallback Error Page
How does Spring Boot support the default error-handling described at the beginning of this article?
- In the event of any unhanded error, Spring Boot forwards internally to
/error. - Boot sets up a
BasicErrorControllerto handle any request to/error. The controller adds error information to the internal Model and returnserroras the logical view name. - If any view-resolver(s) are configured, they will try to use a corresponding error-view.
- Otherwise, a default error page is provided using a dedicated
Viewobject (making it independent of any view-resolution system you may be using). - Spring Boot sets up a
BeanNameViewResolverso that/errorcan be mapped to aViewof the same name. - If you look in Boot’s
ErrorMvcAutoConfigurationclass you will see that thedefaultErrorViewis returned as a bean callederror. This is the View bean found by theBeanNameViewResolver.
The “Whitelabel” error page is deliberately minimal and ugly. You can override it:
- By defining an error template — in our demo we are using Thymeleaf so the error template is in
src/main/resources/templates/error.html(this location is set by the Spring Boot propertyspring.thymeleaf.prefix— similar properties exist for other supported server-side view technologies such as JSP or Mustache). - If you aren’t using server-side rendering
2.1 Define your own error View as a bean callederror.
2.1 Or disable Spring boot’s “Whitelabel” error page by setting the propertyserver.error.whitelabel.enabledtofalse. Your container’s default error page is used instead.
By convention, Spring Boot properties are normally set in application.properties or application.yml.
Integration with SimpleMappingExceptionResolver
What if you are already using SimpleMappingExceptionResolver to setup a default
error view? Simple, use setDefaultErrorView() to define the same view that Spring Boot uses: error.
Note that in the demo, the defaultErrorView property of the SimpleMappingExceptionResolver is deliberately set not to error but to defaultErrorPage so you can see when the handler is generating the error page and when Spring Boot is responsible. Normally both would be set to error.
Container-Wide Exception Handling
Exceptions thrown outside the Spring Framework, such as from a servlet Filter, are also reported by Spring Boot’s fallback error page.
To do this Spring Boot has to register a default error page for the container. In Servlet 2, there is an <error-page> directive that you can add to your web.xml to do this. Sadly Servlet 3 does not offer a Java API equivalent. Instead Spring Boot does the following:
- For a Jar application, with an embedded container, it registers a default error page using Container specific API.
- For a Spring Boot application deployed as a traditional WAR file, a Servlet Filter is used to
catch exceptions raised further down the line and handle it.
<?xml version=«1.0» encoding=«UTF-8»?>
<project xmlns=«http://maven.apache.org/POM/4.0.0»
xmlns:xsi=«http://www.w3.org/2001/XMLSchema-instance»
xsi:schemaLocation=«http://maven.apache.org/POM/4.0.0 http://maven.apache.org/xsd/maven-4.0.0.xsd»>
<modelVersion>4.0.0</modelVersion>
<groupId>ru.javastudy</groupId>
<artifactId>mvc_html5_angular</artifactId>
<version>1.0</version>
<properties>
<!— Generic properties —>
<java.version>1.8</java.version>
<!— Web —>
<jsp.version>2.2</jsp.version>
<jstl.version>1.2</jstl.version>
<servlet.version>3.1.0</servlet.version>
<!— Spring —>
<spring—framework.version>4.2.4.RELEASE</spring—framework.version>
<!— JUnit test —>
<junit.version>4.12</junit.version>
<!— Logging —>
<!—logback — improved version of log4j—>
<logback.version>1.0.13</logback.version>
<slf4j.version>1.7.13</slf4j.version>
<!— jackson json JSON Processing API —>
<jackson.databind—version>2.2.3</jackson.databind—version>
<!— Hibernate / JPA —>
<hibernate.version>5.0.1.Final</hibernate.version>
<!— I don‘t know why, but with 5.0.5 final app not working! —>
<!— Spring Data —>
<spring—framework.data.version>1.9.1.RELEASE</spring—framework.data.version>
</properties>
<dependencyManagement>
<!—all spring dependencies —>
<dependencies>
<dependency>
<groupId>org.springframework</groupId>
<artifactId>spring—framework—bom</artifactId>
<version>${spring—framework.version}</version>
<type>pom</type>
<scope>import</scope>
</dependency>
</dependencies>
</dependencyManagement>
<!—bootstrap webjars.org—>
<dependencies>
<!— Spring MVC —>
<dependency>
<groupId>org.springframework</groupId>
<artifactId>spring—webmvc</artifactId>
</dependency>
<!— Other Servlet Web dependencies —>
<dependency>
<groupId>javax.servlet</groupId>
<artifactId>jstl</artifactId>
<version>${jstl.version}</version>
</dependency>
<!—Servlet API—>
<dependency>
<groupId>javax.servlet</groupId>
<artifactId>javax.servlet—api</artifactId>
<version>${servlet.version}</version>
<scope>provided</scope>
</dependency>
<dependency>
<groupId>javax.servlet.jsp</groupId>
<artifactId>jsp—api</artifactId>
<version>${jsp.version}</version>
<scope>provided</scope>
</dependency>
<!— Apache Commons File Upload —>
<dependency>
<groupId>commons—fileupload</groupId>
<artifactId>commons—fileupload</artifactId>
<version>1.3.1</version>
</dependency>
<dependency>
<groupId>commons—io</groupId>
<artifactId>commons—io</artifactId>
<version>2.4</version>
</dependency>
<!— Excel view —>
<dependency>
<groupId>org.apache.poi</groupId>
<artifactId>poi</artifactId>
<version>3.12</version>
</dependency>
<!— PDF view —>
<dependency>
<groupId>com.lowagie</groupId>
<artifactId>itext</artifactId>
<version>2.1.5</version>
</dependency>
<!— HSQLDB embedded database. Встроенная база данных—>
<dependency>
<groupId>org.hsqldb</groupId>
<artifactId>hsqldb</artifactId>
<version>2.3.3</version>
</dependency>
<!— Spring JDBC —>
<dependency>
<groupId>org.springframework</groupId>
<artifactId>spring—jdbc</artifactId>
</dependency>
<!—JUnit Test—>
<dependency>
<groupId>junit</groupId>
<artifactId>junit</artifactId>
<version>${junit.version}</version>
<scope>test</scope>
</dependency>
<!— Test Artifacts with Spring—>
<dependency>
<groupId>org.springframework</groupId>
<artifactId>spring—test</artifactId>
<scope>test</scope>
</dependency>
<!— Logging with SLF4J & LogBack —>
<dependency>
<groupId>org.slf4j</groupId>
<artifactId>slf4j—api</artifactId>
<version>${slf4j.version}</version>
<scope>compile</scope>
</dependency>
<dependency>
<groupId>ch.qos.logback</groupId>
<artifactId>logback—classic</artifactId>
<version>${logback.version}</version>
<scope>runtime</scope>
</dependency>
<!—Contains org.springframework.mail.javamail—>
<dependency>
<groupId>org.springframework</groupId>
<artifactId>spring—context—support</artifactId>
<version>${spring—framework.version}</version>
</dependency>
<!— Spring MVC Mail Related Dependency —>
<dependency>
<groupId>javax.mail</groupId>
<artifactId>mail</artifactId>
<version>1.4.7</version>
</dependency>
<dependency>
<groupId>org.apache.velocity</groupId>
<artifactId>velocity</artifactId>
<version>1.7</version>
</dependency>
<!— Spring REST jackson JSON Processing API —>
<dependency>
<groupId>com.fasterxml.jackson.core</groupId>
<artifactId>jackson—databind</artifactId>
<version>${jackson.databind—version}</version>
</dependency>
<!—Hibernate ORM—>
<dependency>
<groupId>org.hibernate</groupId>
<artifactId>hibernate—entitymanager</artifactId>
<version>${hibernate.version}</version>
</dependency>
<!—Hibernate validator (contains @NotEmpty)—>
<dependency>
<groupId>org.hibernate</groupId>
<artifactId>hibernate—validator</artifactId>
<version>5.1.0.Final</version>
</dependency>
<!—Spring Data—>
<dependency>
<groupId>org.springframework.data</groupId>
<artifactId>spring—data—jpa</artifactId>
<version>${spring—framework.data.version}</version>
</dependency>
</dependencies>
<build>
<plugins>
<plugin>
<groupId>org.apache.maven.plugins</groupId>
<artifactId>maven—compiler—plugin</artifactId>
<version>3.0</version>
<configuration>
<source>1.8</source>
<target>1.8</target>
<compilerArgument>—Xlint:all</compilerArgument>
<showWarnings>true</showWarnings>
<showDeprecation>true</showDeprecation>
</configuration>
</plugin>
</plugins>
<!—need to find configs in tests in package web—inf like
@ContextConfiguration(locations = {«classpath:/config/application-context.xml»
—>
<testResources>
<testResource>
<directory>src/main/webapp/WEB—INF/config</directory>
</testResource>
</testResources>
</build>
</project>
Prerequisites: Spring MVC
When something goes wrong with your application, the server displays an exception page defining the type of exception, the server-generated exception page is not user-friendly. Spring MVC provides exception handling for your web application to make sure you are sending your own exception page instead of the server-generated exception to the user. The @ExceptionHandler annotation is used to detect certain runtime exceptions and send responses according to the exception. In this article we’ll Spring Mvc project to show how to intercept and define exceptions, we’ll look at how to define method level as well as the class level exception.
Steps to Create the Application
First, create a maven project, we are using Eclipse IDE for this project. Now, search for webapp, as we are creating a web application. Choose to create maven while creating a new project and add a maven webapp archetype. Enter the group id and the artifact id for your project and click finish.
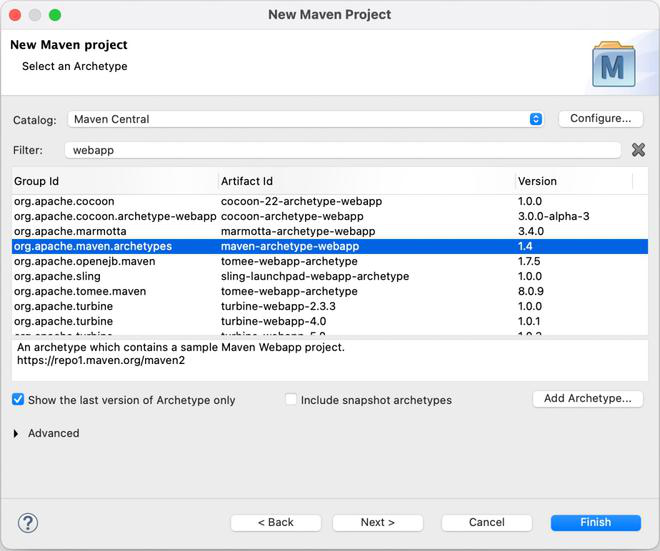
After clicking finish your project structure would look something like this:
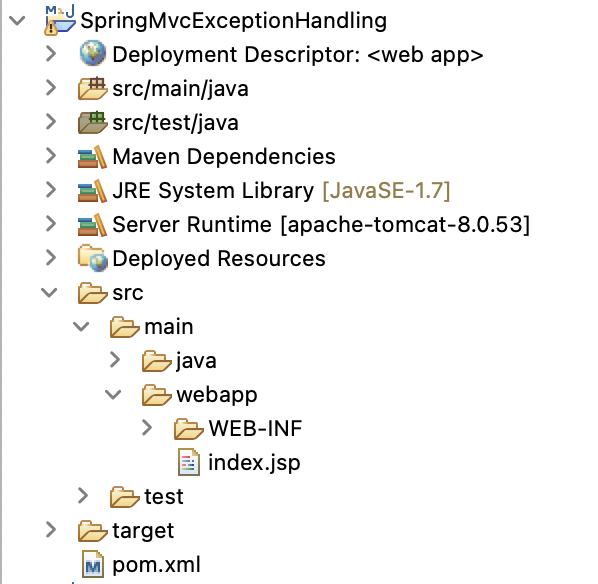
The pom.xml is auto-created with any maven project, it defines all the dependencies required for the project. Make sure to add all the dependencies mentioned in this file.
XML
<?xml version="1.0" encoding="UTF-8"?>
<modelVersion>4.0.0</modelVersion>
<groupId>com.gfg</groupId>
<artifactId>SpringMvcExceptionHandling</artifactId>
<version>0.0.1-SNAPSHOT</version>
<packaging>war</packaging>
<name>SpringMvcExceptionHandling Maven Webapp</name>
<properties>
<project.build.sourceEncoding>UTF-8</project.build.sourceEncoding>
<maven.compiler.source>1.7</maven.compiler.source>
<maven.compiler.target>1.7</maven.compiler.target>
</properties>
<dependencies>
<dependency>
<groupId>junit</groupId>
<artifactId>junit</artifactId>
<version>4.11</version>
<scope>test</scope>
</dependency>
<dependency>
<groupId>org.springframework</groupId>
<artifactId>spring-webmvc</artifactId>
<version>5.1.1.RELEASE</version>
</dependency>
<dependency>
<groupId>org.apache.tomcat</groupId>
<artifactId>tomcat-jasper</artifactId>
<version>9.0.12</version>
</dependency>
<dependency>
<groupId>javax.servlet</groupId>
<artifactId>servlet-api</artifactId>
<version>3.0-alpha-1</version>
</dependency>
<dependency>
<groupId>javax.servlet</groupId>
<artifactId>jstl</artifactId>
<version>1.2</version>
</dependency>
</dependencies>
<build>
<finalName>SpringMvcExceptionHandling</finalName>
<pluginManagement>
<plugins>
<plugin>
<artifactId>maven-clean-plugin</artifactId>
<version>3.1.0</version>
</plugin>
<plugin>
<artifactId>maven-resources-plugin</artifactId>
<version>3.0.2</version>
</plugin>
<plugin>
<artifactId>maven-compiler-plugin</artifactId>
<version>3.8.0</version>
</plugin>
<plugin>
<artifactId>maven-surefire-plugin</artifactId>
<version>2.22.1</version>
</plugin>
<plugin>
<artifactId>maven-war-plugin</artifactId>
<version>3.2.2</version>
</plugin>
<plugin>
<artifactId>maven-install-plugin</artifactId>
<version>2.5.2</version>
</plugin>
<plugin>
<artifactId>maven-deploy-plugin</artifactId>
<version>2.8.2</version>
</plugin>
</plugins>
</pluginManagement>
</build>
</project>
The web.xml defines mapping with different URLs and servlets to handle requests for those URLs.
XML
The gfg-servlet.xml file handles all HTTP requests for the web applications. The component scan locates and allocated beans according to the defined annotation. The annotation-driven enable the spring annotation classes. The bean configuration helps in identifying and scanning the JSP located in the views folder.
XML
The Student class in the com.gfg.model defines the student object with three objects firstName, lastName, and rollNo. Notice that we have kept the roll number as a string instead of an integer, this will help us to check for possible NumberFormat exceptions.
Java
package com.gfg.model;
public class Student {
private String firstName;
private String lastName;
private String rollNo;
public Student(String firstName, String lastName,
String rollNo)
{
super();
this.firstName = firstName;
this.lastName = lastName;
this.rollNo = rollNo;
}
public Student() {}
public String getFirstName() { return firstName; }
public void setFirstName(String firstName)
{
this.firstName = firstName;
}
public String getLastName() { return lastName; }
public void setLastName(String lastName)
{
this.lastName = lastName;
}
public String getRollNo() { return rollNo; }
public void setRollNo(String rollNo)
{
this.rollNo = rollNo;
}
}
The LoginController class in the com.gfg.controller package defines two methods, the showForm method defines a Get mapping and simply shows the student login form. The processForm method has two parameters of @ModelAttribute for students and a Model to set attributes in our view pages. The model parameter sets all the attributes to the view page. Remember, in the Student class we defined rollNo as a String. Now, we will parse it into int: this will help in catching two NumberFormat exceptions. If the string is empty or the string has alphabets for both it will send a NumberFormatException. Now, to catch that exception and handle it separately for better user experience we define a method numberformatHandler and annotate it with the @ExceptionHandler, and set the value to NumberFormatException.class. So, this was a way to handle Exception at the method level.
Java
package com.gfg.controller;
import org.springframework.stereotype.Controller;
import org.springframework.ui.Model;
import org.springframework.web.bind.annotation.ExceptionHandler;
import org.springframework.web.bind.annotation.ModelAttribute;
import org.springframework.web.bind.annotation.RequestMapping;
import com.gfg.model.Student;
@Controller
public class LoginController {
@RequestMapping("/login")
public String showForm(Model theModel) {
theModel.addAttribute("student", new Student());
return "portal";
}
@RequestMapping("/welcome")
public String processForm(@ModelAttribute("welcome") Student student, Model mod) {
mod.addAttribute("FirstName", student.getFirstName());
mod.addAttribute("LastName", student.getLastName());
int n = Integer.parseInt(student.getRollNo());
mod.addAttribute("RollNo", n);
return "welcome";
}
@ExceptionHandler(value = NumberFormatException.class)
public String numberformatHandler(Model theModel) {
theModel.addAttribute("err", "NumberFormatException");
return "error";
}
}
The MyExceptionHandler class in the com.gfg.errorhandler defines all the exceptions for our application so that for a different kind of exception the user sees a proper and simple error page. To make it available for all the classes in our project we just have to add the annotation @ControllerAdvice, this will advise spring MVC to use our exception method instead of server-generated pages. So, In this we have defines an Exception Handler at the class level.
Java
package com.gfg.errorhandler;
import org.springframework.ui.Model;
import org.springframework.web.bind.annotation.ControllerAdvice;
import org.springframework.web.bind.annotation.ExceptionHandler;
@ControllerAdvice
public class MyExceptionHandler {
@ExceptionHandler(value = NullPointerException.class)
public String nullPointerHandler(Model theModel) {
theModel.addAttribute("err", "NullPointerException");
return "error";
}
@ExceptionHandler(value = Exception.class)
public String AnyOtherHandler() {
return "error";
}
}
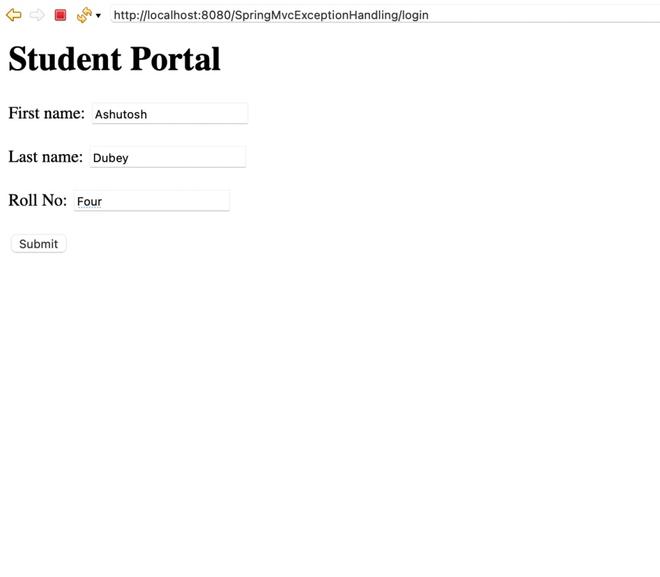
The portal.jsp file in the views folder defines the Student login portal.
HTML
<html>
<head>
</head>
<body>
<h1>Student Portal</h1>
<form:form action="welcome" modelAttribute="student">
<label>First name:</label>
<form:input path="firstName" />
<br><br>
<label>Last name:</label>
<form:input path="lastName" />
<br><br>
<label>Roll No:</label>
<form:input path="rollNo" />
<br><br>
<input type="submit" value="Submit" />
</form:form>
</body>
</html>
The welcome.jsp page in the views folder defines the welcome page for our application.
HTML
<html>
<head>
</head>
<body>
<h1>Student Portal</h1>
<form:form action="welcome" modelAttribute="student">
<label>First name:</label>
<form:input path="firstName" />
<br><br>
<label>Last name:</label>
<form:input path="lastName" />
<br><br>
<label>Roll No:</label>
<form:input path="rollNo" />
<br><br>
<input type="submit" value="Submit" />
</form:form>
</body>
</html>
The error.jsp page is a simple exception handler page that defines the name of the exception and informs the user about an exception.
HTML
<%@ page language="java" contentType="text/html; charset=UTF-8"
pageEncoding="UTF-8"%>
<!DOCTYPE html>
<html>
<head>
<meta charset="UTF-8">
<title>Insert title here</title>
</head>
<body>
<h1>Opps....</h1>
<h1> ${err} Exception caused</h1>
</body>
</html>
After adding all the classes and configuration files your project would look something like this:

Now that we have completed our project, it’s time to run it on a tomcat server, just start the tomcat server and type http:localhost:8080/SpringMvcExceptionHandling/login


So, in this Spring MVC project, we defined exception handlers at the method as well as at class level and defined our own custom exception view page for better user experience.
Prerequisites: Spring MVC
When something goes wrong with your application, the server displays an exception page defining the type of exception, the server-generated exception page is not user-friendly. Spring MVC provides exception handling for your web application to make sure you are sending your own exception page instead of the server-generated exception to the user. The @ExceptionHandler annotation is used to detect certain runtime exceptions and send responses according to the exception. In this article we’ll Spring Mvc project to show how to intercept and define exceptions, we’ll look at how to define method level as well as the class level exception.
Steps to Create the Application
First, create a maven project, we are using Eclipse IDE for this project. Now, search for webapp, as we are creating a web application. Choose to create maven while creating a new project and add a maven webapp archetype. Enter the group id and the artifact id for your project and click finish.
After clicking finish your project structure would look something like this:
The pom.xml is auto-created with any maven project, it defines all the dependencies required for the project. Make sure to add all the dependencies mentioned in this file.
XML
<?xml version="1.0" encoding="UTF-8"?>
<modelVersion>4.0.0</modelVersion>
<groupId>com.gfg</groupId>
<artifactId>SpringMvcExceptionHandling</artifactId>
<version>0.0.1-SNAPSHOT</version>
<packaging>war</packaging>
<name>SpringMvcExceptionHandling Maven Webapp</name>
<properties>
<project.build.sourceEncoding>UTF-8</project.build.sourceEncoding>
<maven.compiler.source>1.7</maven.compiler.source>
<maven.compiler.target>1.7</maven.compiler.target>
</properties>
<dependencies>
<dependency>
<groupId>junit</groupId>
<artifactId>junit</artifactId>
<version>4.11</version>
<scope>test</scope>
</dependency>
<dependency>
<groupId>org.springframework</groupId>
<artifactId>spring-webmvc</artifactId>
<version>5.1.1.RELEASE</version>
</dependency>
<dependency>
<groupId>org.apache.tomcat</groupId>
<artifactId>tomcat-jasper</artifactId>
<version>9.0.12</version>
</dependency>
<dependency>
<groupId>javax.servlet</groupId>
<artifactId>servlet-api</artifactId>
<version>3.0-alpha-1</version>
</dependency>
<dependency>
<groupId>javax.servlet</groupId>
<artifactId>jstl</artifactId>
<version>1.2</version>
</dependency>
</dependencies>
<build>
<finalName>SpringMvcExceptionHandling</finalName>
<pluginManagement>
<plugins>
<plugin>
<artifactId>maven-clean-plugin</artifactId>
<version>3.1.0</version>
</plugin>
<plugin>
<artifactId>maven-resources-plugin</artifactId>
<version>3.0.2</version>
</plugin>
<plugin>
<artifactId>maven-compiler-plugin</artifactId>
<version>3.8.0</version>
</plugin>
<plugin>
<artifactId>maven-surefire-plugin</artifactId>
<version>2.22.1</version>
</plugin>
<plugin>
<artifactId>maven-war-plugin</artifactId>
<version>3.2.2</version>
</plugin>
<plugin>
<artifactId>maven-install-plugin</artifactId>
<version>2.5.2</version>
</plugin>
<plugin>
<artifactId>maven-deploy-plugin</artifactId>
<version>2.8.2</version>
</plugin>
</plugins>
</pluginManagement>
</build>
</project>
The web.xml defines mapping with different URLs and servlets to handle requests for those URLs.
XML
The gfg-servlet.xml file handles all HTTP requests for the web applications. The component scan locates and allocated beans according to the defined annotation. The annotation-driven enable the spring annotation classes. The bean configuration helps in identifying and scanning the JSP located in the views folder.
XML
The Student class in the com.gfg.model defines the student object with three objects firstName, lastName, and rollNo. Notice that we have kept the roll number as a string instead of an integer, this will help us to check for possible NumberFormat exceptions.
Java
package com.gfg.model;
public class Student {
private String firstName;
private String lastName;
private String rollNo;
public Student(String firstName, String lastName,
String rollNo)
{
super();
this.firstName = firstName;
this.lastName = lastName;
this.rollNo = rollNo;
}
public Student() {}
public String getFirstName() { return firstName; }
public void setFirstName(String firstName)
{
this.firstName = firstName;
}
public String getLastName() { return lastName; }
public void setLastName(String lastName)
{
this.lastName = lastName;
}
public String getRollNo() { return rollNo; }
public void setRollNo(String rollNo)
{
this.rollNo = rollNo;
}
}
The LoginController class in the com.gfg.controller package defines two methods, the showForm method defines a Get mapping and simply shows the student login form. The processForm method has two parameters of @ModelAttribute for students and a Model to set attributes in our view pages. The model parameter sets all the attributes to the view page. Remember, in the Student class we defined rollNo as a String. Now, we will parse it into int: this will help in catching two NumberFormat exceptions. If the string is empty or the string has alphabets for both it will send a NumberFormatException. Now, to catch that exception and handle it separately for better user experience we define a method numberformatHandler and annotate it with the @ExceptionHandler, and set the value to NumberFormatException.class. So, this was a way to handle Exception at the method level.
Java
package com.gfg.controller;
import org.springframework.stereotype.Controller;
import org.springframework.ui.Model;
import org.springframework.web.bind.annotation.ExceptionHandler;
import org.springframework.web.bind.annotation.ModelAttribute;
import org.springframework.web.bind.annotation.RequestMapping;
import com.gfg.model.Student;
@Controller
public class LoginController {
@RequestMapping("/login")
public String showForm(Model theModel) {
theModel.addAttribute("student", new Student());
return "portal";
}
@RequestMapping("/welcome")
public String processForm(@ModelAttribute("welcome") Student student, Model mod) {
mod.addAttribute("FirstName", student.getFirstName());
mod.addAttribute("LastName", student.getLastName());
int n = Integer.parseInt(student.getRollNo());
mod.addAttribute("RollNo", n);
return "welcome";
}
@ExceptionHandler(value = NumberFormatException.class)
public String numberformatHandler(Model theModel) {
theModel.addAttribute("err", "NumberFormatException");
return "error";
}
}
The MyExceptionHandler class in the com.gfg.errorhandler defines all the exceptions for our application so that for a different kind of exception the user sees a proper and simple error page. To make it available for all the classes in our project we just have to add the annotation @ControllerAdvice, this will advise spring MVC to use our exception method instead of server-generated pages. So, In this we have defines an Exception Handler at the class level.
Java
package com.gfg.errorhandler;
import org.springframework.ui.Model;
import org.springframework.web.bind.annotation.ControllerAdvice;
import org.springframework.web.bind.annotation.ExceptionHandler;
@ControllerAdvice
public class MyExceptionHandler {
@ExceptionHandler(value = NullPointerException.class)
public String nullPointerHandler(Model theModel) {
theModel.addAttribute("err", "NullPointerException");
return "error";
}
@ExceptionHandler(value = Exception.class)
public String AnyOtherHandler() {
return "error";
}
}
The portal.jsp file in the views folder defines the Student login portal.
HTML
<html>
<head>
</head>
<body>
<h1>Student Portal</h1>
<form:form action="welcome" modelAttribute="student">
<label>First name:</label>
<form:input path="firstName" />
<br><br>
<label>Last name:</label>
<form:input path="lastName" />
<br><br>
<label>Roll No:</label>
<form:input path="rollNo" />
<br><br>
<input type="submit" value="Submit" />
</form:form>
</body>
</html>
The welcome.jsp page in the views folder defines the welcome page for our application.
HTML
<html>
<head>
</head>
<body>
<h1>Student Portal</h1>
<form:form action="welcome" modelAttribute="student">
<label>First name:</label>
<form:input path="firstName" />
<br><br>
<label>Last name:</label>
<form:input path="lastName" />
<br><br>
<label>Roll No:</label>
<form:input path="rollNo" />
<br><br>
<input type="submit" value="Submit" />
</form:form>
</body>
</html>
The error.jsp page is a simple exception handler page that defines the name of the exception and informs the user about an exception.
HTML
<%@ page language="java" contentType="text/html; charset=UTF-8"
pageEncoding="UTF-8"%>
<!DOCTYPE html>
<html>
<head>
<meta charset="UTF-8">
<title>Insert title here</title>
</head>
<body>
<h1>Opps....</h1>
<h1> ${err} Exception caused</h1>
</body>
</html>
After adding all the classes and configuration files your project would look something like this:
Now that we have completed our project, it’s time to run it on a tomcat server, just start the tomcat server and type http:localhost:8080/SpringMvcExceptionHandling/login
So, in this Spring MVC project, we defined exception handlers at the method as well as at class level and defined our own custom exception view page for better user experience.
In this tutorial we take a look at how to use Spring MVC Exception Handling. We can design our application to deal with exceptions in various ways. We could handle the exceptions in the methods where they occur, but most of the time this leads to cluttered and duplicated exception handling code, so we are not showing you this. The following is an overview of what we’ll see in this article:
- Handling controller local exceptions – We can catch the exceptions using a
@ExceptionHandlerlocally in the controller. This will override any pre-defined global exception handler. - Global exception handler – Catch exceptions globally across all controllers.
- Custom 404 response – Instead of the default 404 page, we return a JSON response containing a detailed message.
- Custom error pages – Instead of showing the default error pages of your servlet container, we create a custom error page displaying the occurred error message.
- Business Exceptions – by annotating custom business methods with
@ResponseStatusspring automatically returns the status code defined in the annotation.
Spring MVC Exception Handling
To start, we are using the following Java Object to return a fault code together with a detailed message. As this class will be used across all examples, we show you this first. Later on we look at the previous examples into more detail.
package com.memorynotfound.model;

public class Error {

    private int code;
    private String message;

    public Error() {
    }

    public Error(int code, String message) {
        this.code = code;
        this.message = message;
    }

    public int getCode() {
        return code;
    }

    public String getMessage() {
        return message;
    }
}
Handling Controller Local Exceptions
Using Spring MVC we can handle the exceptions occurred in a controller locally. We have two options, either by annotating a method with the @ExceptionHandler annotation and provide the class of the exception that needs to be handled. Or, we can also implement the HandlerExceptionResolver where we need to implement the resolveException(HttpServletRequest req, HttpServletResponse resp, Object handler, Exception ex), this method will resolve any exceptions occurred inside the controller methods.
Controller Local Exceptions with @ExceptionHandler
Here is an example how to handle exceptions locally in the controller they occurred. We annotate a method using the @ExceptionHandler annotation and provide the exception (or an array of exceptions) the method needs to handle. The more specific exception takes priority over the general one.
package com.memorynotfound.controller;
import com.memorynotfound.model.Error;
import org.springframework.http.HttpStatus;
import org.springframework.http.ResponseEntity;
import org.springframework.web.bind.annotation.*;
@RestController
@RequestMapping("/courses")
public class CourseController {
@RequestMapping(method = RequestMethod.GET)
public ResponseEntity<Object> get(){
throw new RuntimeException("courses not yet supported");
}
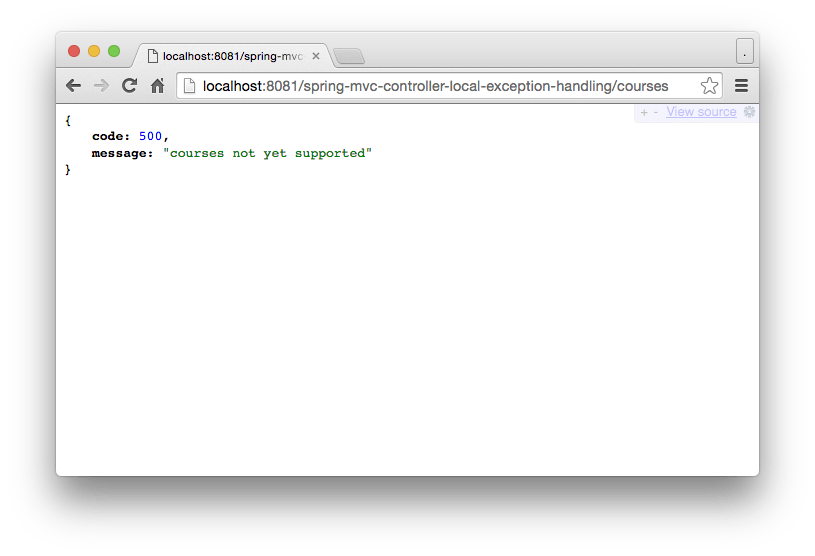
@ExceptionHandler(RuntimeException.class)
public ResponseEntity<Error> handle(RuntimeException ex){
System.out.println("controller local exception handling @ExceptionHandler");
Error error = new Error(HttpStatus.INTERNAL_SERVER_ERROR.value(), ex.getMessage());
return new ResponseEntity<Error>(error, HttpStatus.INTERNAL_SERVER_ERROR);
}
}The return type can be a String, which is interpreted as a view name, a ModelAndView object, a ResponseEntity, or you can also add the @ResponseBody to have the method return value converted with message converters and written to the response stream.
URL: http://localhost:8081/spring-mvc-controller-local-exception-handling/courses
Controller local Exceptions with HandlerExceptionResolver
Here is an example implementing the HandlerExceptionResolver. By implementing this interface we must override the resolveException() method. This method will handle all exceptions thrown by the controller. In order to get the type of the exception, we need to do an instanceof operation.
package com.memorynotfound.controller;
import org.springframework.http.HttpStatus;
import org.springframework.http.ResponseEntity;
import org.springframework.web.bind.annotation.RequestMapping;
import org.springframework.web.bind.annotation.RequestMethod;
import org.springframework.web.bind.annotation.RestController;
import org.springframework.web.servlet.HandlerExceptionResolver;
import org.springframework.web.servlet.ModelAndView;
import org.springframework.web.servlet.view.json.MappingJackson2JsonView;
import javax.servlet.http.HttpServletRequest;
import javax.servlet.http.HttpServletResponse;
@RestController
@RequestMapping("/students")
public class StudentController implements HandlerExceptionResolver {
@RequestMapping(method = RequestMethod.GET)
public ResponseEntity<Object> get(){
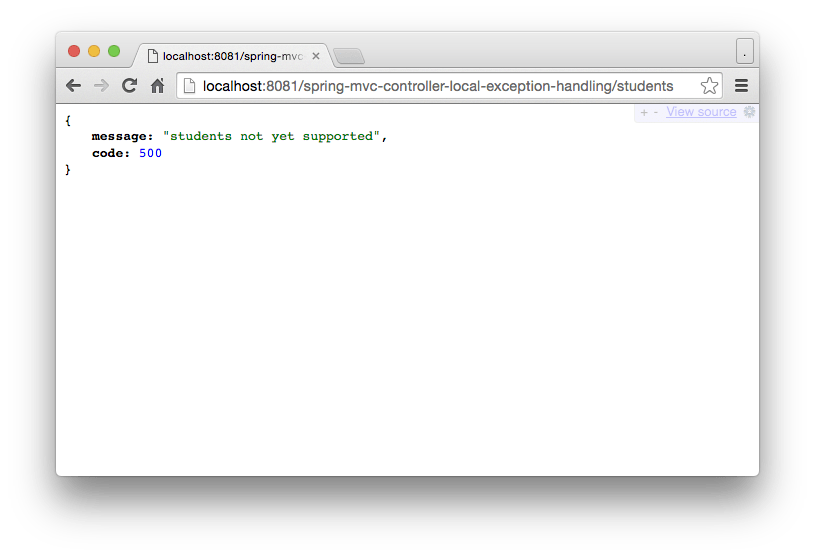
throw new RuntimeException("students not yet supported");
}
@Override
public ModelAndView resolveException(HttpServletRequest req, HttpServletResponse resp, Object handler, Exception ex) {
System.out.println("controller local exception handling HandlerExceptionResolver");
resp.reset();
resp.setCharacterEncoding("UTF-8");
resp.setContentType("text/json");
ModelAndView model = new ModelAndView(new MappingJackson2JsonView());
if (ex instanceof RuntimeException){
resp.setStatus(HttpServletResponse.SC_INTERNAL_SERVER_ERROR);
model.addObject("code", HttpStatus.INTERNAL_SERVER_ERROR.value());
model.addObject("message", ex.getMessage());
} else {
resp.setStatus(HttpServletResponse.SC_INTERNAL_SERVER_ERROR);
model.addObject("code", HttpStatus.INTERNAL_SERVER_ERROR.value());
model.addObject("message", ex.getMessage());
}
return model;
}
}In this example we return a JSON response by setting the view of the ModelAndView to an instance of the MappingJackson2JsonView class. We also add a status code to the response via the HttpServletResponse#setStatus() in order to tell the client some error has occurred.
URL: http://localhost:8081/spring-mvc-controller-local-exception-handling/students
Global Exceptions Handler
The following example shows how to handle exceptions globally, across all controllers. This really encapsulates the DRY-principle. Because our exception handling code is located only in a single place.
package com.memorynotfound.controller;

import org.springframework.http.ResponseEntity;
import org.springframework.web.bind.annotation.*;

@RestController
@RequestMapping("/courses")
public class CourseController {

    @RequestMapping(method = RequestMethod.GET)
    public ResponseEntity<Object> getList(){
        throw new RuntimeException("courses not yet supported");
    }

}
The @ExceptionHandler method becomes a global exception handler when we move this method in a separate class annotated with the @ControllerAdvice annotation. The ResponseEntityExceptionHandler is not mandatory but by using ResponseEntityExceptionHandler you can override the standard Spring MVC exceptions.
package com.memorynotfound.exception;

import com.memorynotfound.model.Error;
import org.springframework.http.HttpStatus;
import org.springframework.http.ResponseEntity;
import org.springframework.web.bind.annotation.ControllerAdvice;
import org.springframework.web.bind.annotation.ExceptionHandler;
import org.springframework.web.servlet.mvc.method.annotation.ResponseEntityExceptionHandler;

@ControllerAdvice
public class GlobalExceptionHandler extends ResponseEntityExceptionHandler {

    @ExceptionHandler(RuntimeException.class)
    public ResponseEntity<Error> handle(RuntimeException ex){
        Error error = new Error(HttpStatus.INTERNAL_SERVER_ERROR.value(), ex.getMessage());
        return new ResponseEntity<Error>(error, HttpStatus.INTERNAL_SERVER_ERROR);
    }

}
URL: http://localhost:8081/spring-mvc-global-exception-handling/courses

Custom 404 Response
By default, when a page/resource does not exist the servlet container will throw a 404 page. When you are developing API’s and you want a custom 404 JSON response, here is how.
package com.memorynotfound.config;

import org.springframework.web.context.WebApplicationContext;
import org.springframework.web.servlet.DispatcherServlet;
import org.springframework.web.servlet.support.AbstractAnnotationConfigDispatcherServletInitializer;

public class ServletInitializer extends AbstractAnnotationConfigDispatcherServletInitializer {

    @Override
    protected Class<?>[] getServletConfigClasses() {
        return new Class[] { WebConfig.class };
    }

    @Override
    protected String[] getServletMappings() {
        return new String[] { "/" };
    }

    @Override
    protected Class<?>[] getRootConfigClasses() {
        return null;
    }

    @Override
    protected DispatcherServlet createDispatcherServlet(WebApplicationContext servletAppContext) {
        final DispatcherServlet servlet = (DispatcherServlet) super.createDispatcherServlet(servletAppContext);
        servlet.setThrowExceptionIfNoHandlerFound(true);
        return servlet;
    }
}
We need to tell the DispatcherServlet to throw the exception if no handler is found. We can do this by setting the throwExceptionIfNoHandlerFound servlet initialization parameter to true. The previous code will set the property to true when you are configuring your servlet container using java configuration.
When using XML to configure the servlet container, you can set the property using the following code.
<servlet>
<servlet-name>rest-dispatcher</servlet-name>
<servlet-class>org.springframework.web.servlet.DispatcherServlet</servlet-class>
<init-param>
<param-name>throwExceptionIfNoHandlerFound</param-name>
<param-value>true</param-value>
</init-param>
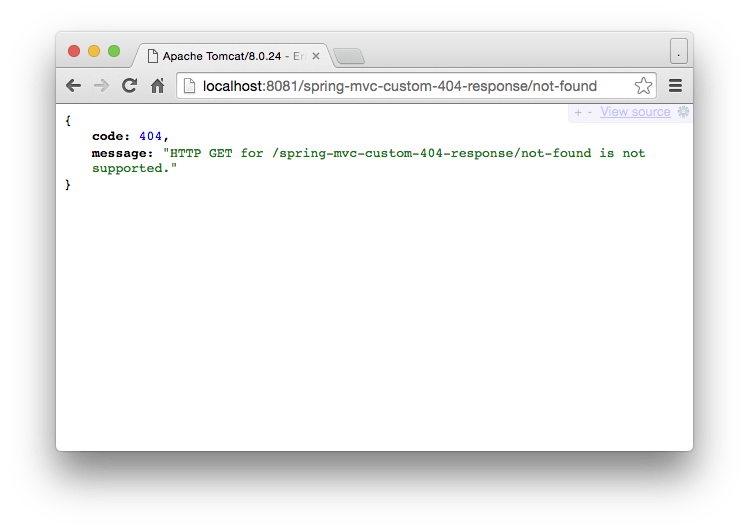
</servlet>Next, we catch the NoHandlerFoundException and return a custom error message containing an error code and detailed description.
package com.memorynotfound.exception;

import com.memorynotfound.model.Error;
import org.springframework.http.HttpStatus;
import org.springframework.http.ResponseEntity;
import org.springframework.web.bind.annotation.ControllerAdvice;
import org.springframework.web.bind.annotation.ExceptionHandler;
import org.springframework.web.servlet.NoHandlerFoundException;

@ControllerAdvice
public class GlobalExceptionHandler {

    @ExceptionHandler(NoHandlerFoundException.class)
    public ResponseEntity<Error> handle(NoHandlerFoundException ex){
        String message = "HTTP " + ex.getHttpMethod() + " for " + ex.getRequestURL() + " is not supported.";
        Error error = new Error(HttpStatus.NOT_FOUND.value(), message);
        return new ResponseEntity<Error>(error, HttpStatus.NOT_FOUND);
    }

}
URL: http://localhost:8081/spring-mvc-custom-404-response/not-found
Custom Error Pages
The following example shows how you can create custom error pages. Take a look at the CourseController, there are two controller methods registered. The first will throw a RuntimeException, the second will throw a ArithmeticException. We define a controller-local exception handler using the @ExceptionHandler annotation and return a ModelAndView containing the occurred exception and forward it to the error page.
package com.memorynotfound.controller;

import org.springframework.web.bind.annotation.*;
import org.springframework.web.servlet.ModelAndView;

@RestController
@RequestMapping("/courses")
public class CourseController {

    @RequestMapping(method = RequestMethod.GET)
    public String getList(){
        throw new RuntimeException("courses not yet supported");
    }

    @RequestMapping(value = "{id}", method = RequestMethod.GET)
    public String get(@PathVariable int id){
        throw new ArithmeticException("cannot divide by zero");
    }

    @ExceptionHandler(RuntimeException.class)
    public ModelAndView handle(RuntimeException ex){
        ModelAndView model = new ModelAndView("error");
        model.addObject("exception", ex);
        return model;
    }

}
This is an example how to configure the SimpleMappingExceptionResolver using Java configuration. This resolver enables you to take the class name of any exception that might be thrown and map it to a view name.
@Bean
public SimpleMappingExceptionResolver exceptionResolver(){
    SimpleMappingExceptionResolver resolver = new SimpleMappingExceptionResolver();
    Properties exceptions = new Properties();
    exceptions.put(ArithmeticException.class, "error");
    resolver.setExceptionMappings(exceptions);
    return resolver;
}
This is an example how to configure the SimpleMappingExceptionResolver using XML configuration
<bean class="org.springframework.web.servlet.handler.SimpleMappingExceptionResolver">
<property name="exceptionMappings">
<props>
<prop key="java.lang.ArithmeticException">error</prop>
</props>
</property>
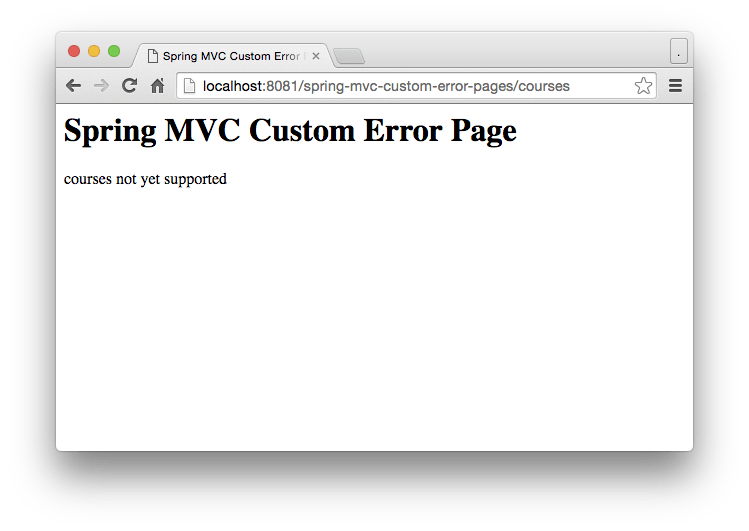
</bean>The error.jsp page displays the occurred exception.
<%@ page contentType="text/html;charset=UTF-8" language="java" %>
<html>
<head>
    <title>Spring MVC Exception Handling</title>
</head>
<body>

<h1>Spring MVC Exception Handling</h1>

${exception.message}

</body>
</html>
URL: http://localhost:8081/spring-mvc-custom-error-pages/courses
When we access the controller method, the page is forwarded to the error page displaying the occurred exception.
Custom Exceptions annotated with @ResponseStatus
You can annotate an exception with the @ResponseStatus. Here you can provide a status code and a detailed exception message. When the exception is raised, the ResponseStatusExceptionResolver handles it by setting the status of the response accordingly.
package com.memorynotfound.exception;
import org.springframework.http.HttpStatus;
import org.springframework.web.bind.annotation.ResponseStatus;
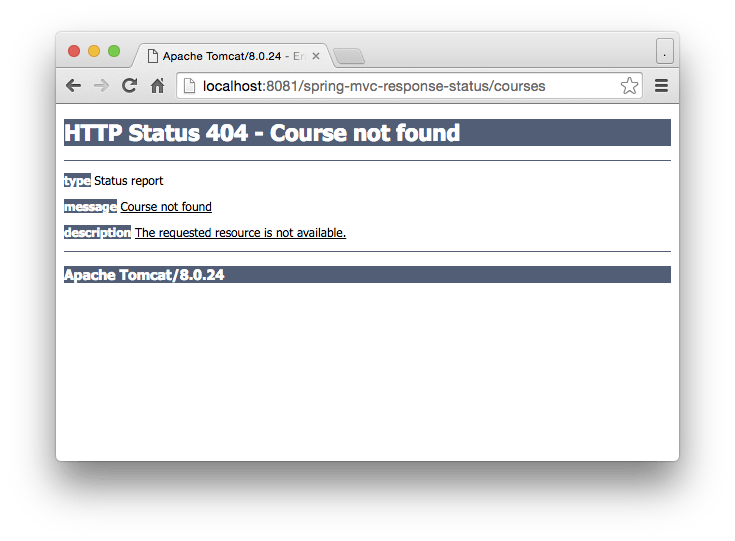
@ResponseStatus(value = HttpStatus.NOT_FOUND, reason = "Course not found")
public class CourseNotFoundException extends RuntimeException {
public CourseNotFoundException() {
}
}You can just throw the exception inside the controller and the ResponseStatusExceptionResolver will handle it automatically.
package com.memorynotfound.controller;

import com.memorynotfound.exception.CourseNotFoundException;
import org.springframework.http.ResponseEntity;
import org.springframework.web.bind.annotation.*;

@RestController
@RequestMapping("/courses")
public class CourseController {

    @RequestMapping(method = RequestMethod.GET)
    public ResponseEntity<Object> getList(){
        throw new CourseNotFoundException();
    }

}
URL: http://localhost:8081/spring-mvc-response-status/courses
When we access the controller, the following page is displayed.
References
- Spring MVC Documentation
- @ControllerAdvice JavaDoc
- @ExceptionHandler JavaDoc
- ResponseEntityExceptionHandler JavaDoc
- HandlerExceptionResolver JavaDoc
- SimpleMappingExceptionResolver JavaDoc
- @ResponseStatus JavaDoc
Download
Download it –
- spring-mvc-global-exception-handler-example
- spring-mvc-custom-error-page-example
- spring-mvc-custom-404-response-example
- spring-mvc-controller-local-exception-handling-example
- spring-mvc-handling-business-exceptions-example
В следующем примере показано, как использовать обработку ошибок и валидаторы в формах с использованием Spring Web MVC Framework. Для начала давайте создадим рабочую среду Eclipse и рассмотрим следующие шаги для разработки веб-приложения на основе динамических форм с использованием Spring Web Framework.
| шаг | Описание |
|---|---|
| 1 | Создайте проект с именем HelloWeb в пакете com.tutorialspoint, как описано в главе Spring MVC – Hello World. |
| 2 | Создайте Java-классы Student, StudentController и StudentValidator в пакете com.tutorialspoint. |
| 3 | Создайте файлы представлений addStudent.jsp, result.jsp в подпапке jsp. |
| 4 | Последний шаг – создание содержимого исходного файла и файлов конфигурации и экспорт приложения, как описано ниже. |
Student.java
package com.tutorialspoint;

public class Student {
   private Integer age;
   private String name;
   private Integer id;

   public void setAge(Integer age) {
      this.age = age;
   }
   public Integer getAge() {
      return age;
   }

   public void setName(String name) {
      this.name = name;
   }
   public String getName() {
      return name;
   }

   public void setId(Integer id) {
      this.id = id;
   }
   public Integer getId() {
      return id;
   }
}
StudentValidator.java
package com.tutorialspoint;

import org.springframework.validation.Errors;
import org.springframework.validation.ValidationUtils;
import org.springframework.validation.Validator;

public class StudentValidator implements Validator {

   @Override
   public boolean supports(Class<?> clazz) {
      return Student.class.isAssignableFrom(clazz);
   }

   @Override
   public void validate(Object target, Errors errors) {
      ValidationUtils.rejectIfEmptyOrWhitespace(errors,
         "name", "required.name","Field name is required.");
   }
}
StudentController.java
package com.tutorialspoint;

import org.springframework.beans.factory.annotation.Autowired;
import org.springframework.beans.factory.annotation.Qualifier;
import org.springframework.stereotype.Controller;
import org.springframework.ui.Model;
import org.springframework.validation.BindingResult;
import org.springframework.validation.Validator;
import org.springframework.validation.annotation.Validated;
import org.springframework.web.bind.WebDataBinder;
import org.springframework.web.bind.annotation.InitBinder;
import org.springframework.web.bind.annotation.ModelAttribute;
import org.springframework.web.bind.annotation.RequestMapping;
import org.springframework.web.bind.annotation.RequestMethod;
import org.springframework.web.servlet.ModelAndView;

@Controller
public class StudentController {

   @Autowired
   @Qualifier("studentValidator")
   private Validator validator;

   @InitBinder
   private void initBinder(WebDataBinder binder) {
      binder.setValidator(validator);
   }

   @RequestMapping(value = "/addStudent", method = RequestMethod.GET)
   public ModelAndView student() {
      return new ModelAndView("addStudent", "command", new Student());
   }

   @ModelAttribute("student")
   public Student createStudentModel() {
      return new Student();
   }

   @RequestMapping(value = "/addStudent", method = RequestMethod.POST)
   public String addStudent(@ModelAttribute("student") @Validated Student student,
      BindingResult bindingResult, Model model) {

      if (bindingResult.hasErrors()) {
         return "addStudent";
      }
      model.addAttribute("name", student.getName());
      model.addAttribute("age", student.getAge());
      model.addAttribute("id", student.getId());

      return "result";
   }
}
HelloWeb-servlet.xml
<beans xmlns = "http://www.springframework.org/schema/beans"
   xmlns:context = "http://www.springframework.org/schema/context"
   xmlns:xsi = "http://www.w3.org/2001/XMLSchema-instance"
   xsi:schemaLocation = "
   http://www.springframework.org/schema/beans
   http://www.springframework.org/schema/beans/spring-beans-3.0.xsd
   http://www.springframework.org/schema/context
   http://www.springframework.org/schema/context/spring-context-3.0.xsd">

   <context:component-scan base-package = "com.tutorialspoint" />

   <bean class = "org.springframework.web.servlet.view.InternalResourceViewResolver">
      <property name = "prefix" value = "/WEB-INF/jsp/" />
      <property name = "suffix" value = ".jsp" />
   </bean>

   <bean id = "studentValidator" class = "com.tutorialspoint.StudentValidator" />
</beans>
Здесь для первого сервисного метода student () мы передали пустой объект Studentobject в объекте ModelAndView с именем «command», потому что среда Spring ожидает объект с именем «command», если вы используете теги <form: form> в вашем файле JSP. Таким образом, когда вызывается метод student (), он возвращает представление addStudent.jsp .
Второй сервисный метод addStudent () будет вызываться для метода POST по URL-адресу HelloWeb / addStudent . Вы подготовите свой модельный объект на основе предоставленной информации. Наконец, из метода сервиса будет возвращено представление «result», что приведет к визуализации result.jsp. Если при использовании валидатора возникают ошибки, то возвращается то же представление «addStudent», Spring автоматически внедряет сообщения об ошибках из представления BindingResult .
addStudent.jsp
<%@taglib uri = "http://www.springframework.org/tags/form" prefix = "form"%>
<html>
<head>
<title>Spring MVC Form Handling</title>
</head>
<style>
.error {
color: #ff0000;
}
.errorblock {
color: #000;
background-color: #ffEEEE;
border: 3px solid #ff0000;
padding: 8px;
margin: 16px;
}
</style>
<body>
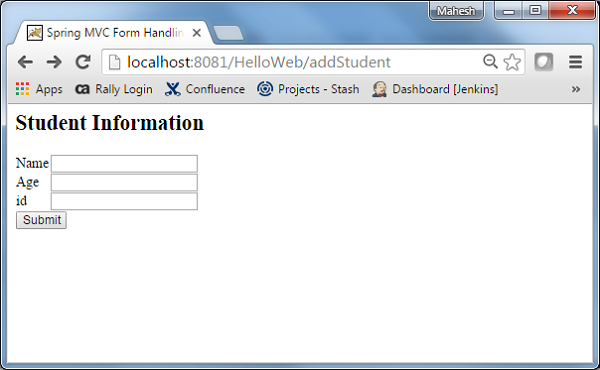
<h2>Student Information</h2>
<form:form method = "POST" action = "/HelloWeb/addStudent" commandName = "student">
<form:errors path = "*" cssClass = "errorblock" element = "div" />
<table>
<tr>
<td><form:label path = "name">Name</form:label></td>
<td><form:input path = "name" /></td>
<td><form:errors path = "name" cssClass = "error" /></td>
</tr>
<tr>
<td><form:label path = "age">Age</form:label></td>
<td><form:input path = "age" /></td>
</tr>
<tr>
<td><form:label path = "id">id</form:label></td>
<td><form:input path = "id" /></td>
</tr>
<tr>
<td colspan = "2">
<input type = "submit" value = "Submit"/>
</td>
</tr>
</table>
</form:form>
</body>
</html>
Здесь мы используем тег <form: errors /> with path = “*” для отображения сообщений об ошибках. Например
<form:errors path = "*" cssClass = "errorblock" element = "div" />
Он будет отображать сообщения об ошибках для всех проверок ввода.
Мы используем тег <form: errors /> with path = “name” для отображения сообщения об ошибке для поля имени. Например
<form:errors path = "name" cssClass = "error" />
Он будет отображать сообщения об ошибках для проверки полей имени.
result.jsp
 <% @ taglib uri = "http://www.springframework.org/tags/form" prefix = "form"%>
 <HTML>
    <Голова>
       <title> Spring MVC Form Handling </ title>
    </ HEAD>
    <Тело>

       <h2> Отправленная информация об ученике </ h2>
       <Таблица>
          <TR>
             <TD> Имя </ TD>
             <TD> $ {имя} </ TD>
          </ TR>
          <TR>
             <TD> Возраст </ TD>
             <TD> $ {возраст} </ TD>
          </ TR>
          <TR>
            <TD> ID </ TD>
            <TD> $ {ID} </ TD>
          </ TR>
       </ Table>
    </ Body>
 </ Html>
Когда вы закончите создавать исходные файлы и файлы конфигурации, экспортируйте ваше приложение. Щелкните правой кнопкой мыши свое приложение, выберите « Экспорт» → «Файл WAR» и сохраните файл HelloWeb.war в папке веб-приложений Tomcat.
Теперь запустите сервер Tomcat и убедитесь, что вы можете получить доступ к другим веб-страницам из папки webapps с помощью стандартного браузера. Попробуйте URL – http: // localhost: 8080 / HelloWeb / addStudent, и мы увидим следующий экран, если все в порядке с веб-приложением Spring.
После отправки необходимой информации, нажмите на кнопку отправки, чтобы отправить форму. Вы должны увидеть следующий экран, если все в порядке с веб-приложением Spring.
Spring MVC @ExceptionHandler Пример
В этом руководстве мы покажем вам, как выполнять обработку исключений в средах Spring MVC. Обычно мы используем@ExceptionHandler, чтобы решить, какое «представление» должно быть возвращено, если возникает определенное исключение.
P.S This @ExceptionHandler class is available since Spring 3.0
1. Структура проекта
Просмотрите структуру каталогов проекта, стандартный проект Maven.

2. Пользовательское исключение
Пользовательское исключение с пользовательским кодом ошибки и описанием ошибки.
CustomGenericException.java
package com.example.web.exception;

public class CustomGenericException extends RuntimeException {

    private static final long serialVersionUID = 1L;

    private String errCode;
    private String errMsg;

    public String getErrCode() {
        return errCode;
    }

    public void setErrCode(String errCode) {
        this.errCode = errCode;
    }

    public String getErrMsg() {
        return errMsg;
    }

    public void setErrMsg(String errMsg) {
        this.errMsg = errMsg;
    }

    public CustomGenericException(String errCode, String errMsg) {
        this.errCode = errCode;
        this.errMsg = errMsg;
    }

}
3. Spring Controller
Контроллер Spring, просмотрите потоки выполнения ниже:
-
Если пользователь предоставляет запрос
/error, он генерирует исключение CustomGenericException, и методhandleCustomException()запускается. -
Если пользователь предоставляет запрос
/io-error, он генерирует «IOException», и методhandleAllException()запускается.
MainController.java
package com.example.web.controller;

import java.io.IOException;
import org.springframework.stereotype.Controller;
import org.springframework.web.bind.annotation.ExceptionHandler;
import org.springframework.web.bind.annotation.PathVariable;
import org.springframework.web.bind.annotation.RequestMapping;
import org.springframework.web.bind.annotation.RequestMethod;
import org.springframework.web.servlet.ModelAndView;

import com.example.web.exception.CustomGenericException;

@Controller
public class MainController {

    @RequestMapping(value = "/{type:.+}", method = RequestMethod.GET)
    public ModelAndView getPages(@PathVariable("type") String type)
        throws Exception {

      if ("error".equals(type)) {
        // go handleCustomException
        throw new CustomGenericException("E888", "This is custom message");
      } else if ("io-error".equals(type)) {
        // go handleAllException
        throw new IOException();
      } else {
        return new ModelAndView("index").addObject("msg", type);
      }

    }

    @ExceptionHandler(CustomGenericException.class)
    public ModelAndView handleCustomException(CustomGenericException ex) {

        ModelAndView model = new ModelAndView("error/generic_error");
        model.addObject("errCode", ex.getErrCode());
        model.addObject("errMsg", ex.getErrMsg());

        return model;

    }

    @ExceptionHandler(Exception.class)
    public ModelAndView handleAllException(Exception ex) {

        ModelAndView model = new ModelAndView("error/generic_error");
        model.addObject("errMsg", "this is Exception.class");

        return model;

    }

}
4. Страницы JSP
pages/index.jsp
<%@taglib prefix="c" uri="http://java.sun.com/jsp/jstl/core"%>


    Spring MVC @ExceptionHandler Example


        ${msg}
pages/error/generic_error.jsp
<%@taglib prefix="c" uri="http://java.sun.com/jsp/jstl/core"%>


        ${errCode} : System Errors


        System Errors


        ${errMsg}
5. тестирование
Просмотрите следующие 3 теста:


6. Пример @ControllerAdvice
Приведенный выше пример@ExceptionHandler применим только к одному контроллеру, чтобы применить его глобально (все контроллеры), аннотируйте класс с помощью@ControllerAdvice.
GlobalExceptionController.java
package com.example.web.controller;

import org.springframework.web.bind.annotation.ControllerAdvice;
import org.springframework.web.bind.annotation.ExceptionHandler;
import org.springframework.web.servlet.ModelAndView;
import com.example.web.exception.CustomGenericException;

@ControllerAdvice
public class GlobalExceptionController {

    @ExceptionHandler(CustomGenericException.class)
    public ModelAndView handleCustomException(CustomGenericException ex) {

        ModelAndView model = new ModelAndView("error/generic_error");
        model.addObject("errCode", ex.getErrCode());
        model.addObject("errMsg", ex.getErrMsg());

        return model;

    }

    @ExceptionHandler(Exception.class)
    public ModelAndView handleAllException(Exception ex) {

        ModelAndView model = new ModelAndView("error/generic_error");
        model.addObject("errMsg", "this is Exception.class");

        return model;

    }

}
7. Скачать исходный код
- Details
- Written by
- Last Updated on 17 May 2020 | Print Email
This Spring tutorial helps you understand how to handle exceptions in a Spring MVC web application with code examples.
You know, in Spring MVC, unexpected exceptions might be thrown during execution of its controllers. Spring provides two approaches for handling these exceptions:
-
- Using XML configuration: this is similar to exception handling in Servlet/JSP, by declaring a SimpleMappingExceptionResolverbean in Spring’s application context file and map exception types with view names. This approach applies to all controllers in the application.
- Using exception handler method: Spring provides the @ExceptionHandler annotation type which is used to annotate a method to handle exceptions raised by the controller’s methods. This approach applies to only the controller in which the handler method is declared.
Let’s look at each approach in details.
1. Using XML configuration
This approach uses XML to configure exceptions handling declaratively. Consider the following bean declaration in Spring’s application context file:
<bean
	class="org.springframework.web.servlet.handler.SimpleMappingExceptionResolver">

	<property name="exceptionMappings">
		<props>
			<prop key="java.lang.ArithmeticException">MathError</prop>
		</props>
	</property>

</bean>
That will map any exceptions of type java.lang.ArithmeticException (or its sub types) to the view named MathError. During execution of a Spring controller, if such an exception is thrown, the client will be redirected to the mapped view. For example, if we configure a view resolver likes this:
<bean id="viewResolver"
	class="org.springframework.web.servlet.view.InternalResourceViewResolver">
	<property name="prefix" value="/WEB-INF/views/" />
	<property name="suffix" value=".jsp" />
</bean>
Then Spring will redirect the client to the page /WEB-INF/views/MathError.jsp in case a java.lang.ArithmeticException exception is thrown. Accessing the exception in the MathError.jsp page as follows:
Arithmetic Error: ${exception}
Assuming we have the following controller class:
@Controller
@RequestMapping("/doMath")
public class MathController {
	@RequestMapping(method = RequestMethod.GET)
	public ModelAndView calculateSum(@RequestParam int a, @RequestParam int b) {
		ModelAndView model = new ModelAndView("MathResult");

		model.addObject("sum", (a + b));
		model.addObject("subtract", (a - b));
		model.addObject("multiply", (a * b));
		model.addObject("divide", (a / b));

		return model;
	}
}
The method calculateSum() will handle the request /doMath, it takes two numbers a and b from the request and calculates sum, subtract, multiply and divide of them. The results are added to the model of the view called “MathResult”. In this code, there are two possible exceptions:
-
- Either a or b is not a number.
- b is zero, so the operation a / b will throw a java.lang.ArithmeticException exception.
Following is code of the MathResult.jsp page:
<%@ page language="java" contentType="text/html; charset=UTF-8"
    pageEncoding="UTF-8"%>
<!DOCTYPE html PUBLIC "-//W3C//DTD HTML 4.01 Transitional//EN"
	"http://www.w3.org/TR/html4/loose.dtd">
<html>
<head>
<meta http-equiv="Content-Type" content="text/html; charset=UTF-8">
<title>Sum Result</title>
</head>
<body>
	<center>
		<b>Sum: ${sum} </b><br/>
		<b>Subtract: ${subtract} </b><br/>
		<b>Multiply: ${multiply} </b><br/>
		<b>Divide: ${divide} </b><br/>
	</center>
</body>
</html>
Code of the MathError.jsp page:
<%@ page language="java" contentType="text/html; charset=UTF-8"
    pageEncoding="UTF-8"%>
<!DOCTYPE html PUBLIC "-//W3C//DTD HTML 4.01 Transitional//EN"
	"http://www.w3.org/TR/html4/loose.dtd">
<html>
<head>
<meta http-equiv="Content-Type" content="text/html; charset=UTF-8">
<title>Error</title>
</head>
<body>
	<h2>
		Mathematical Error: ${exception} <br/>
	</h2>
</body>
</html>
Output when testing the application with two numbers a = 2000 and b = 100:
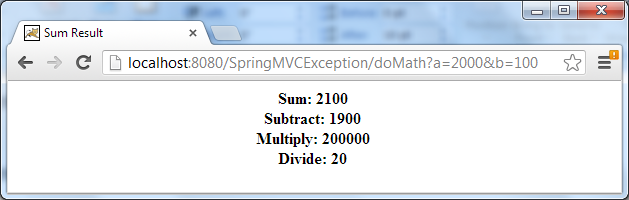
If we pass b = 0, then the MathError.jsp page will be displayed:
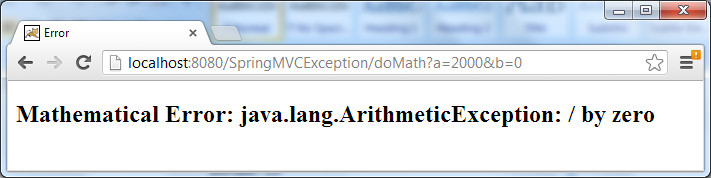
We can configure a default error view for all exceptions which are not specified in the exceptionMappings property, by specifying a view name for the defaultErrorView property. For example:
<bean
	class="org.springframework.web.servlet.handler.SimpleMappingExceptionResolver">
	<property name="exceptionMappings">
		<props>
			<prop key="java.lang.ArithmeticException">MathError</prop>
		</props>
	</property>

	<property name="defaultErrorView" value="Error" />

</bean>
That tells Spring to redirect the client to the Error.jsp page if any exceptions other than the java.lang.ArithmeticException is thrown. Code of the Error.jsp page is similar to the MathError.jsp page:
<%@ page language="java" contentType="text/html; charset=UTF-8"
    pageEncoding="UTF-8"%>
<!DOCTYPE html PUBLIC "-//W3C//DTD HTML 4.01 Transitional//EN"
	"http://www.w3.org/TR/html4/loose.dtd">
<html>
<head>
<meta http-equiv="Content-Type" content="text/html; charset=UTF-8">
<title>Error</title>
</head>
<body>
	<h3>
		General Error: ${exception}
	</h3>
</body>
</html>
Output when testing the application with a = 2000 and b = ten (not a number):
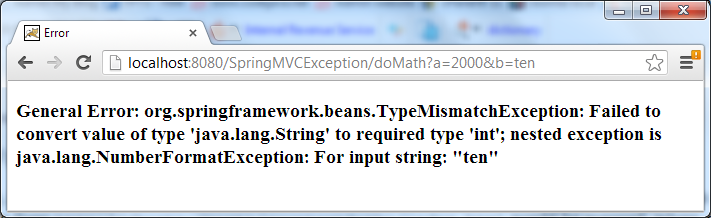
As we can see, the Error.jsp page is displayed because the exception thrown is of type TypeMismatchException, not ArithmeticException.
We also can specify multiple mappings for exception types — view names as follows:
<bean
	class="org.springframework.web.servlet.handler.SimpleMappingExceptionResolver">

	<property name="exceptionMappings">
		<props>
			<prop key="java.lang.ArithmeticException">MathError</prop>
			<prop key="java.io.IOException">IOError</prop>
		</props>
	</property>

</bean>
2. Using exception handler method
This approach uses the @ExceptionHandler annotation to annotate a method in controller class to handle exceptions raised during execution of the controller’s methods. Consider the following controller class:
@Controller
public class FileUploadController {

	@RequestMapping(value = "/uploadFile", method = RequestMethod.GET)
	public String doFileUpload(@RequestParam int a) throws IOException, SQLException {

		// handles file upload stuff...
		if (a == 1) {
			throw new IOException("Could not read upload file.");
		} else if (a == 2) {
			throw new SQLException("Database exception!!!");
		}

		return "done";
	}

	@ExceptionHandler({IOException.class, java.sql.SQLException.class})
	public ModelAndView handleIOException(Exception ex) {
		ModelAndView model = new ModelAndView("IOError");

		model.addObject("exception", ex.getMessage());

		return model;
	}
}
The method doFileUpload() may throw an IOException, and the handler method is declared as follows:
@ExceptionHandler(IOException.class)
public ModelAndView handleIOException(IOException ex) {
	ModelAndView model = new ModelAndView("IOError");

	model.addObject("exception", ex.getMessage());

	return model;
}
This handleIOException() method will be invoked whenever an exception of type java.io.IOException (or its sub types) is raised within the controller class. Spring will pass the exception object into the method’s argument.
Using exception handler method is very flexible, as it allows us doing some processing before returning to the error view. We can also pass additional information to the view’s model when necessary, for example:
model.addObject("info", "extra info for the exception");
It’s also possible to specify a list of exception classes in the @ExceptionHanlder annotation, for example:
@ExceptionHandler({IOException.class, java.sql.SQLException.class})
public ModelAndView handleIOException(Exception ex) {
	ModelAndView model = new ModelAndView("IOError");

	model.addObject("exception", ex.getMessage());

	return model;
}
If the exception being thrown is one of the types (or sub types) in the list, the annotated method will be invoked. In the code above, if the exception is either of type IOException or SQLException, then the handleIOException() method will be invoked.
3. Conclusion
Using XML configuration (declaration of SimpleMappingExceptionResolverbean) will apply exception handling rules for the entire application, whereas using handler method (annotated by @ExceptionHandler annotation) will have effect only within the enclosing controller class. The XML declaration approach takes precedence over the annotation approach, so if we declared a SimpleMappingExceptionResolverbean in Spring’s application context file, then any @ExceptionHandler annotations will be ignored.
Related Spring Tutorials:
- Understand the core of Spring framework
- Understand Spring MVC
- Spring MVC Form Handling Tutorial
- Spring MVC Form Validation Tutorial
- Spring MVC with JdbcTemplate Example
- Spring MVC + Spring Data JPA + Hibernate — CRUD Example
- 14 Tips for Writing Spring MVC Controller
- How to use log4j in Spring MVC
About the Author:
 Nam Ha Minh is certified Java programmer (SCJP and SCWCD). He started programming with Java in the time of Java 1.4 and has been falling in love with Java since then. Make friend with him on Facebook and watch his Java videos you YouTube.